Welcome to Data Processing
NOTE
Single crystal data-processing codes are written by Dr. Jacob Ruff based on reference
The purpose of this guide is to illustrate some of the main features that Jacob's code provides. It assumes a very basic working knowledge with python pakages. To download the package please go to the github link.
The code provides various tools for stacking the raw data, finding Bragg peaks, solving orientation matrix and finally provide the HKL. The results are visible to NeXpy GUI.
Data Policy
Data policy
We only stored the raw data for six months and processed data for a year. Please process the data and copy it to your server. If you need more time, then consult your beamline scientist.
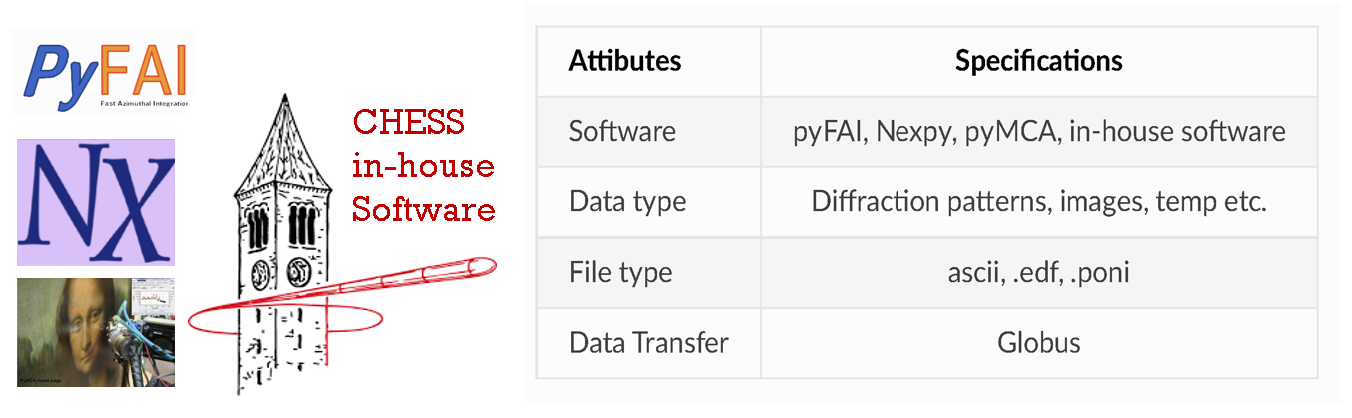
Software
Single crystal data-processing steps
STEP I: Calibrate Detector & BeamlineSTEP II: Stack dataSTEP III: Find Bragg peaksSTEP IV: Solve orientation matrixSTEP V: Convert stacks of data to HKL volume
Usage
Examples
Step I : Calibrate Detector & Beamline
After collecting data from CeO2, LaB6, we calibrate the date by using pyFAI-calib2. Referemce shown below
Reference: pyFAI reference :pyFAI. pyFAI-calib2 : calibration_video Calibration of a diffraction setup using the Graphical User Interface (GUI)
# Create calibration folder to the desired file location where new_averaged_file (i.e. ceria37keV.cbf) will save
>>> cd calibration

#pyFAI-average -o <new_averaged_filename> <location of the datapath> <all the filenames>
#Example:
>>> pyFAI-average -o ceria37keV.cbf /nfs/chess/id4b/2022-3/sarker-0000-0/raw6M/ceria/standard/300/ceria_001/ceria_PIL10_001_*.cbf``            #   generates average of all the images
>>> pyFAI-calib2            #   generates .poni and mask.edf files
After doing the calibration, save the .poni and mask file
===========================================================================
Computers : Data processing

Recommendation : lnx306 to run the stacking code, HKL convertion code in lnx1034-f1
In the beamline, you will find the folder codebase_for_users where all codes are saved.
lnx306 or lnx1034-f1 can make ~3 stacks at a time before running out of the memory
auto_ormfinder and Pil6M_HKLConv both take all the CPUs.
STEP II : Stack data
The script take all the detector's raw .cbf files and performed calibration. You can the get the stack_em_all_cbf_2022.py.
Step 1 :  the `python stack_em_all_cbf_2022.py` python script
Modify :
        i) Project name :
                        proj_name = "sarker-000-a/" (#project name)
        ii) Provide the .poni filename
                        calibfile = "/nfs/chess/id4baux/"+run_cycle+"+proj_name+"/calibration/ceria37keV.poni"
        iii)Provide .edf filename
                        maskfile = "/nfs/chess/id4baux/"+run_cycle+"+proj_name+"/calibration/mask.edf"

Step 2 : Run python code
    Usage:
    python stack_em_all_cbf_2022.py    chem_formula sample_id spec_scan_num temperature

    Example:
    >>>python stack_em_all_cbf_2022.py CoTiO3 sample 11 50

Step 3 : Check data
    After stacking is done the processed data will be avilable in id4baux folder
You can create bash script to run the stacking
    #!  /bin/bash
    python stack_em_all_cbf_2022.py CoTiO3 sample 11 50
    python stack_em_all_cbf_2022.py CoTiO3 sample 12 50
    python stack_em_all_cbf_2022.py CoTiO3 sample 13 50
===========================================================================
STEP III: Find Bragg peaks
simple_peakfinder.py script
Step 1: After stacking is done, take the whole stack from the id4aux data folder and run simple_peakfinder.py code

    Usage:
    python simple_peakfinder.py /full/path/to/stack/ 0.95

    Example:
    >>> python simple_peakfinder.py /nfs/chess/id4baux/2022-3/sarker-0000-a/CoTiO3/sample/300/ 0.95
Would consider anything above 95% of max counts as a Bragg peak. You can change the thereshold as needed. Check the number of peaks, you find after running the code. In between 200-3000 is a good number.
===========================================================================
STEP IV: Solve orientation matrix
auto_ormfinder.py script
Usage:
python auto_ormfinder.py */full/path/to/stack/ peakfilename.npy

Example:
>>>python auto_ormfinder.py /nfs/chess/id4baux/2022-3/sarker-0000-a/CoTiO3/sample/300/ peaklist1.npy
Please provide a space between pathname (/nfs/chess/id4baux/2022-3/sarker-0000-a/CoTiO3/sample/300/) and peaklist1.npy
===========================================================================
STEP V: Convert stacks of data to HKL volume
Pil6M_HKLConv_3D_2022.py python script (edit to point to project, ormatrix, and define HKL grid)
Step 1: Edit the script
    i) Change the project name
                projd = "/nfs/chess/id4baux/2022-3/sarker-0000-a"
                sampldi = "/CoTiO3/sample/"
    ii) Change the sample name:
                sampldi = "/CoTiO3/sample/"
    iii) Change the ormatix
                ormat = nxload(stackhklpath+"ormatrix_v1.nxs")
    iv) Define the hkl space to histogram
                H= np.arrange (-5.1, 5.1, 0.01)
                K= np.arrange (-5.1, 5.1, 0.01)
                L= np.arrange (-5.1, 5.1, 0.01)

Step 2:
Usage:
python  Pil6M_HKLConv_3D_2022.py temperature

Example:
python Pil6M_HKLConv_3D_2022.py 50
Runnning same sample at different temperature processing
- Step A: Do the stacking (follow
STEP Iabove) - Step B: Copy the
orientation matrixfrom processed data - Step C: Run
STEP V
===========================================================================
Software NxRefine
For document, please visit the the website documentation written by Dr. Ray Osborn
- Setting up experiment