Cryostat Installation
- Step 1: Relocate the cryostream position
- Step 2: Stop the the 'phi' motor connection from MDCP, disengage it from the difractometer, unscrew the phi motor
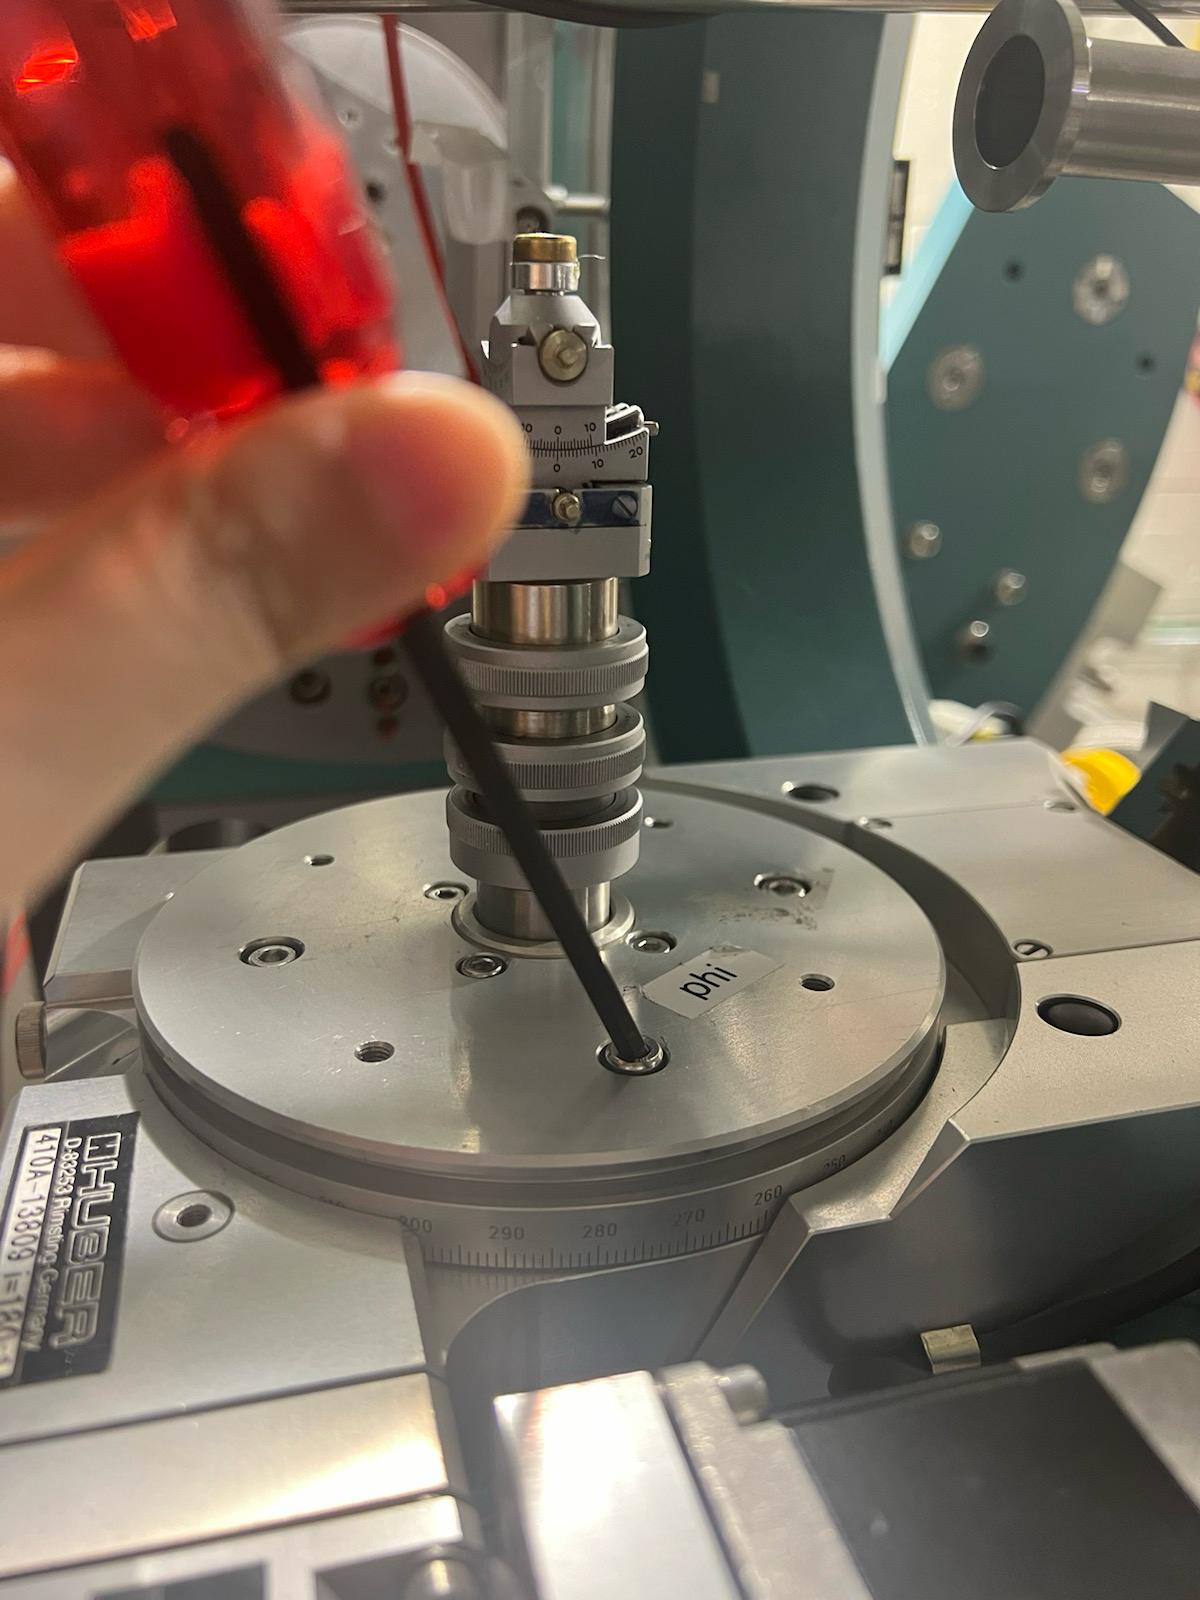
- Step 3 : Remove the goniometer sample stage

- Step 4 : Turn off the compressor by pressing 'off' button

- Step 5: Wait until everything is 300K before turing off the cryostream

- Step 6 : Disconnect the waterline and connect it to the lakeshore1

- Step 7: Move the 6M pilatus detector at the end and place the 100K pilatus two theta to 0 degree.
- Step 8: Move the difractometer 'chi' position 90 to 270. Place the sumitomoto stage from the top. Tighten that by key showed in the figure.
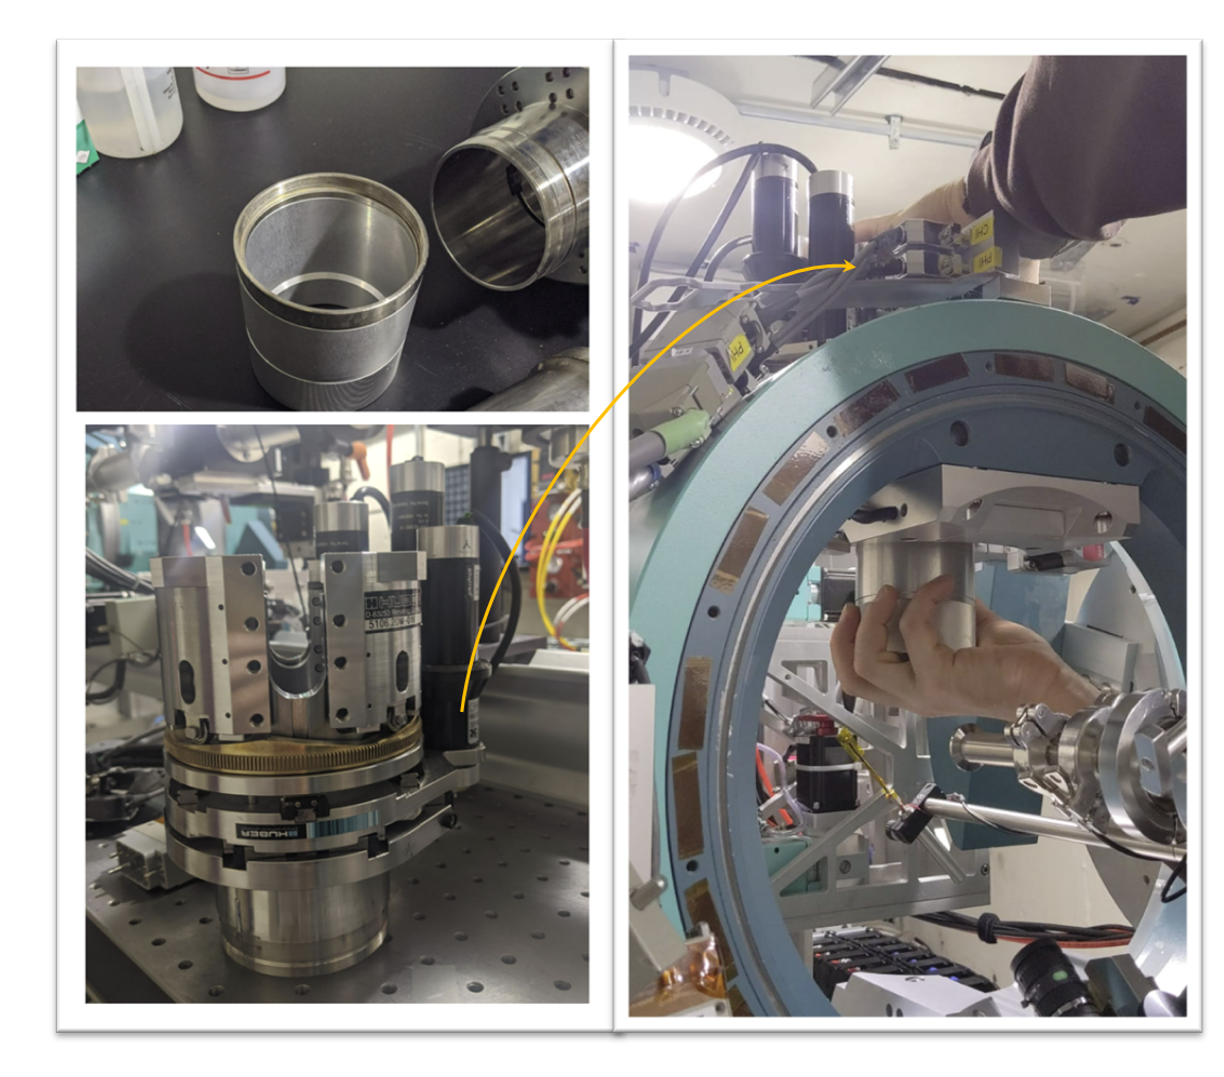
- Step 9: Place the sumitomoto sample stage from the top shown in (a) and (b). Tighten the screw shown in Figure (c)

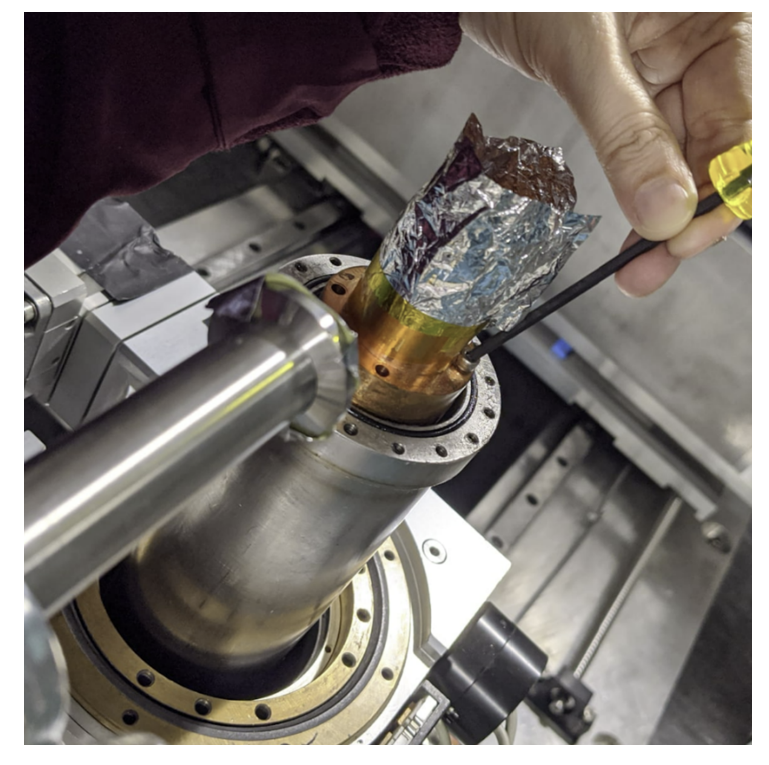
- Step 10: Rotate the whole stage 'phi' and 'chi' to take it dowm from chi 270 to 90. Make sure don't knock anything.

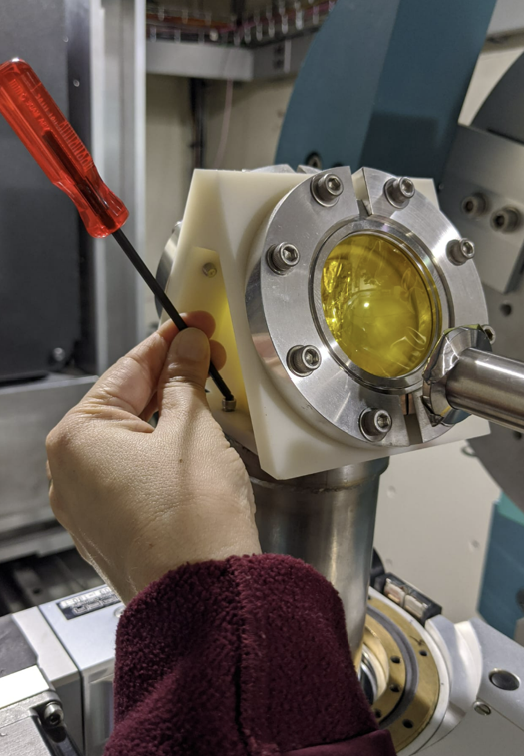
- Step 11: Place to 0-ring to the sample stage.

- Step 12: Place the second part of the sample.
- Step 13: Place the top part of the sample stage.
- Step 14: Make sure the all the motor limits : theta, two theta, phi, chi